
Setting Up Digital Witness™?
First download and install Digital Witness™from the Apple App Store, just like any other app.
To set up Digital Witness™, launch the app.
1. Launch Digital Witness™
When you launch Digital Witness™, you will initially be greeted by the splash screen, shown at right. This will automatically forward to the home screen after approximately half to one second.
2. Set Up
The Digital Witness™ Home Screen is shown below at left (1).
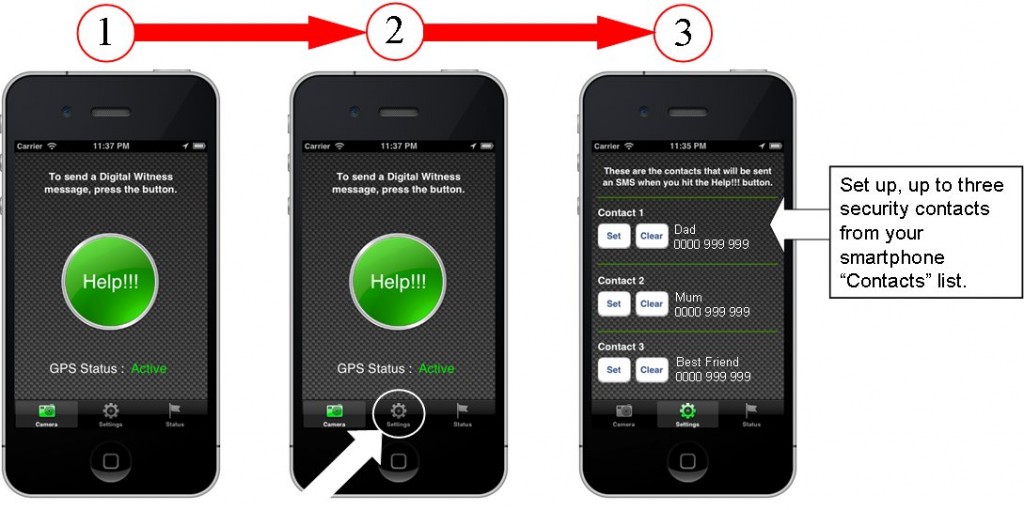
To Set up Digital Witness™ for use, select the “Settings” tab (2) on the home screen.
The setting screen (3) gives you the option of inputting up to three security contacts who will receive your Digital Witness™ help message when you press the “Help” button.
You select your security contacts from your contacts list.
Digital Witness™ is now ready for use.
To work properly, Digital Witness™ requires Location Services and Mobile Data to be turned ON.
If you are not sure, follow the link “How to check Location and Mobile Data are ON” on the menu at left.
3. Test Digital Witness™
Make sure you tell your security contacts that you have loaded Digital Witness™ onto your phone. Do a trial run just to check everything is working OK. In particular confirm your security contacts are receiving the Digital Witness™ alerts as expected and can view the photo and Google map location sent with your alert.
4. Using Digital Witness™ Internationally
Digital Witness will work anywhere in the world. If you are travelling internationally and using a mobile phone with a SIM card from your home country ensure that you have included the country code as part of the phone number for your security contacts if they are back in your home country.
When you are travelling, it’s a good idea to include some one local as a security contact, such as local friends, relatives or business contacts.